🪐 Flare-On 9 Writeups (p. 1)
CTF RE writeups Flare-OnTable of Contents:
- 0. 📝 Git repo
- 1. 🗿 flaredle
- 2. 🔳 pixelpoker
- 3. 🎱 magic8ball
- 4. 🔙 darn_mice
- 5. 🔎 t8
- 6. 🧪 alamode
- 7. 🔥 The conclusion (p. 1)
Look’s like you’ve found my writeups for the Flare-On 9 🎁. I’m not sure how you got here, but I’m glad you did :D
Before we start, a few words about the CTF itself.
Flare-On is an international reverse engineering CTF organized by the Mandiant FLARE team. This year the participants were given 11 challenges to solve. The tasks required a wide range of skills, from basic JavaScript and Python reverse-engineering to advanced .NET analysis and deobfuscator development. Even more, there was a Macintosh 6.0 application to scrutinize ![]() .
.
As you might’ve guessed, the CTF was a blast. 5’345 registered users, with 4,288 of them solving at least one challenge and almost 500 of them solving all 11 tasks. I’m happy to say that I was one of them 🎉, experiencing a lot of fun and learning a lot of new things along the way. I hope you’ll enjoy my writeups as much as I enjoyed solving the challenges.
So yeah, it promises to be an exciting journey. Time to buckle up - we’re taking off 🚀
P.S. If you want to learn more about control-flow obfuscation, or how to use Triton to automatically solve program’s constraints, I especially suggest reading this writeup: 🛸 anode.
This is part 1 of 2. Part 2 is available here: 🕹 Flare-On 9 Writeups (p. 2).
0. 📝 Git repo
You can obtain all the code snippets that were used in these writeups in my git repo
1. 🗿 flaredle
Technologies: JS, HTML
Tools used: Chrome DevTools, VSCode
Time: < 10 mins
Rating: ⭐⭐⭐⭐
As is usually the case with Flare-On challenges, the first one is a simple one.
We are given two javascript files: script.js and words.js. After reading the code, it is clear that the flag is hidden in the words.js file.
const CORRECT_GUESS = 57;
...
let rightGuessString = WORDS[CORRECT_GUESS];
Just read the word at index 57 from the WORDS array and you get the flag 🚩
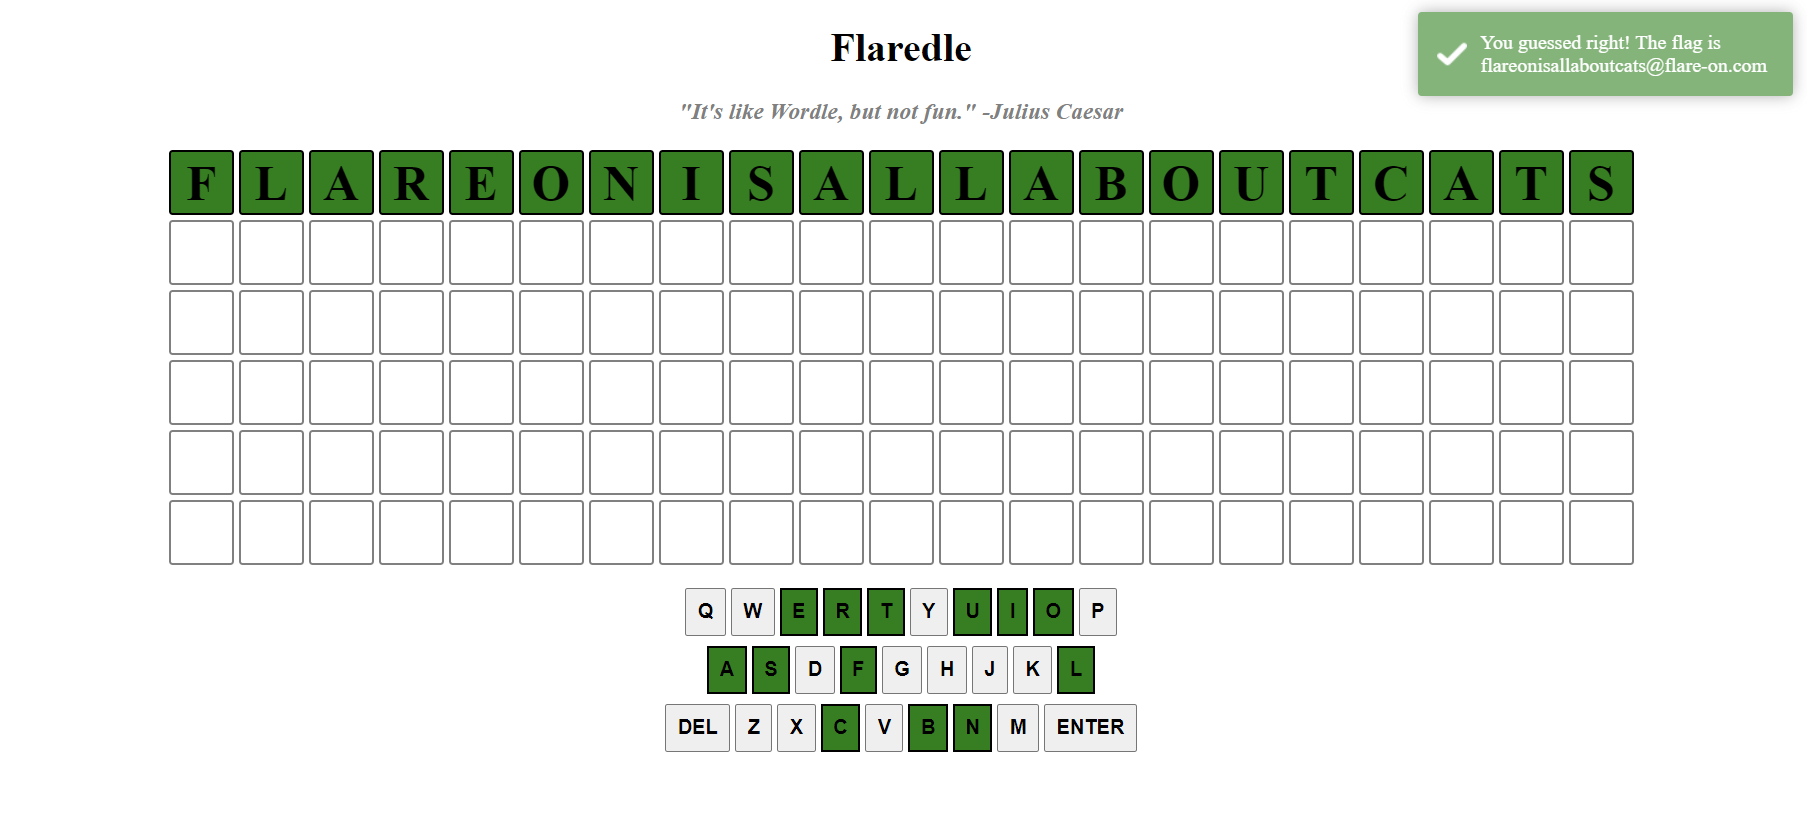
Flag: flareonisallaboutcats@flare-on.com
2. 🔳 pixelpoker
Technologies: WinAPI, C/C++
Tools used: IDA
Time: < 20 mins
Rating: ⭐⭐⭐⭐
The second challenge is a bit more interesting. We are given a pixelpoker.exe.
After running it, we can see that it is a simple game where you have to click on each pixel to decrypt it. However, the problem is that we have only 10 attempts which is certainly not enough to decrypt the whole image.
![]()
Are we going to click on each pixel until we get the flag?…. No! It’s time to finally open it in IDA.
After a bit of reversing, I came across the following code:
ATOM __cdecl sub_401120(HINSTANCE hInstance)
{
    WNDCLASSEXW wndClass; // [esp+0h] [ebp-30h] BYREF

    wndClass.cbSize = 0x30;
    wndClass.style = 3;
    wndClass.lpfnWndProc = (WNDPROC)sub_4012C0;
    wndClass.cbClsExtra = 0;
    wndClass.cbWndExtra = 0;
    wndClass.hInstance = hInstance;
    wndClass.hIcon = LoadIconW(hInstance, (LPCWSTR)0x6B);
    wndClass.hCursor = LoadCursorW(0, (LPCWSTR)0x7F00);
    wndClass.hbrBackground = (HBRUSH)6;
    wndClass.lpszMenuName = (LPCWSTR)0x6D;
    wndClass.lpszClassName = &ClassName;
    wndClass.hIconSm = LoadIconW(hInstance, (LPCWSTR)0x6C);
    return RegisterClassExW(&wndClass);
}
This function registers a window class. The most interesting part is the lpfnWndProc field. It is a pointer to the window procedure function. This function is called by the system whenever the application needs to process an event. In our case, it is called when the user interacts with the window.
Let’s take a look at the sub_4012C0 function:
LRESULT __stdcall sub_4012C0(HWND hWnd, UINT Msg, WPARAM wParam, MouseClick click)
{
    ...
    ++totalClicks;
    xMax = ::xMax;
    if (click.x == encodedXCoord % (unsigned int)::xMax) {
        yMax = ::yMax;
        if (click.y == encodedYCoord % (unsigned int)::yMax) {
            ...
            for (uint32_t x = 0; x < xMax; x++)
                for (uint32_t y = 0; y < yMax; y++)
                    DecryptPixel(x, y);
            ...
        }

        xMax = ::xMax;
    }

    else {
        yMax = ::yMax;
    }

    if (click.x < xMax && click.y < yMax)
        DecryptPixel(click.x, click.y);
    ...
}
Here we can clearly realize that every time we click on a pixel, it is decrypted. But what is interesting is that there is a check for the coordinates of the clicked pixel. If the coordinates match the desired ones, then the whole image is decrypted. It turns out that we just need to find the pixel’s coordinates.
Running the program in debug mode we can find the values for xMax and yMax:
![]()
As well as the values for encodedXCoord and encodedYCoord:
![]()
It’s worth noting that the values for xMax/yMax are the image size. And it is possible to obtain these values without debugging the program, but it’s easier to do it this way.
Now we just need to calculate the coordinates of the pixel:
x = 0x52414C46 % 741 = 95
y = 0x6E4F2D45 % 641 = 313
Click on the pixel and get the flag 🚩
![]()
Flag: w1nN3r_W!NneR_cHick3n_d1nNer@flare-on.com
3. 🎱 magic8ball
Technologies: C/C++, GUI
Tools used: IDA
Time: < 45 mins
Rating: ⭐⭐⭐⭐
Moving on to the third challenge, we are given a Magic8Ball.exe, a bunch of libraries, and some resources.
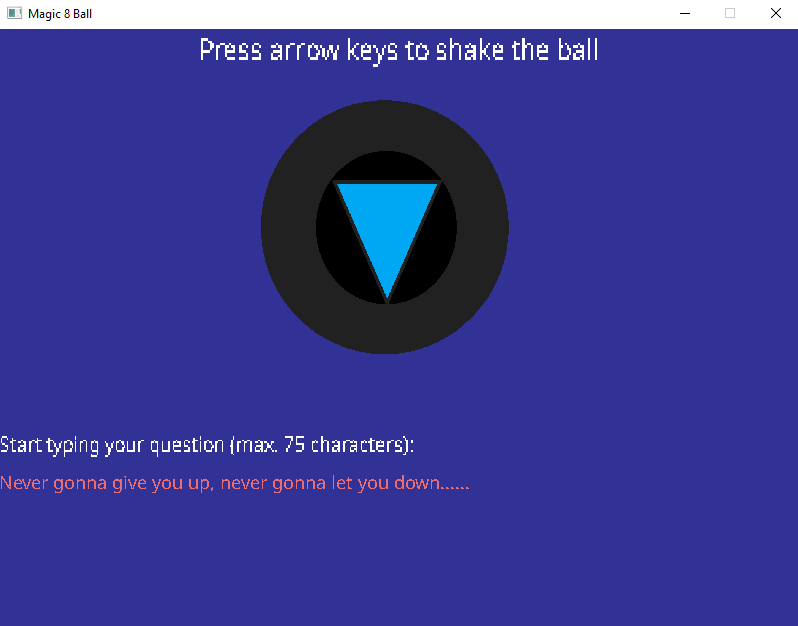
After running the program, we can see that it is a simple GUI application that allows you to ask a question, shake the 🔮 magic 8 ball and get an answer.
Time to reverse
Without further interruptions, let’s celebrate and … open it in IDA. After some reversing, I found the following function:
void __thiscall sub_1724E0(State *this)
{
    ...
    if (BYTE1(this[0x1C].sdlRenderer)) {
        v13 = p_sdlRenderer[5];
        v14 = p_sdlRenderer;
        if (v13 >= 0x10)
            v14 = *p_sdlRenderer;

        if (*v14 == 'L') {
            v15 = p_sdlRenderer;
            if (v13 >= 0x10)
                v15 = *p_sdlRenderer;

            if (*(v15 + 1) == 'L') {
                v16 = p_sdlRenderer;
                if (v13 >= 0x10)
                    v16 = *p_sdlRenderer;

                if (*(v16 + 2) == 'U') {
                    v17 = p_sdlRenderer;
                    if (v13 >= 0x10)
                        v17 = *p_sdlRenderer;

                    if (*(v17 + 3) == 'R') {
                        v18 = p_sdlRenderer;
                        if (v13 >= 0x10)
                            v18 = *p_sdlRenderer;

                        if (*(v18 + 4) == 'U') {
                            v19 = p_sdlRenderer;
                            if (v13 >= 0x10)
                                v19 = *p_sdlRenderer;

                            if (*(v19 + 5) == 'L') {
                                v20 = p_sdlRenderer;
                                if (v13 >= 0x10)
                                    v20 = *p_sdlRenderer;

                                if (*(v20 + 6) == 'D') {
                                    v21 = p_sdlRenderer;
                                    if (v13 >= 0x10)
                                        v21 = *p_sdlRenderer;

                                    if (*(v21 + 7) == 'U') {
                                        v22 = p_sdlRenderer;
                                        if (v13 >= 0x10)
                                            v22 = *p_sdlRenderer;

                                        if (*(v22 + 8) == 'L') {
                                            v23 = &this[0x14].sdlRenderer;
                                            if (this[0x16].sdlWindow >= 0x10)
                                                v23 = *v23;

                                            if (!strncmp(v23, &this[7].sdlRenderer, 0xFu)) {
                                                sub_171220(v24, p_sdlRenderer);
                                                RC4_Encrypt(this, v24[0], v24[1], v24[2], v24[3], v25,
                                                    v26);
                                            }
                                        }
                                    }
                                }
                            }
                        }
                    }
                }
            }
        }
    }
}
Uuuf, that’s a lot of if statements. But if we look closely, we can notice that in the end there is a call to strncmp and RC4_Encrypt functions, feels like we are on the right track. But how do we get to this point? Let’s look at the code above. Every if statement compares something with values: L, R, U, and D, and we can shake the ball only in 4 directions: Left, Right, Up, and Down. So, I can conclude that these if statements check whether we have shaken the ball in the correct order.
Let’s try to shake the ball in the right order and see what happens.
Left
Left
Up
Right
Up
Left
Down
Up
Left
…
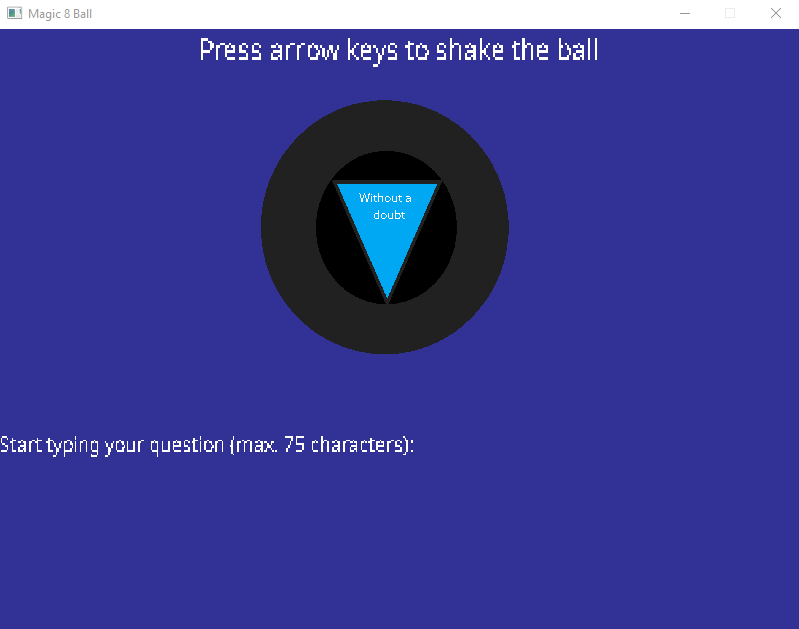
“Without a doubt”? Is that a flag? No, not really. Let’s look at the code again… There is a call to strncmp function? This function compares two strings and returns 0 if they are equal. Let’s find out what strings are compared.
Finding the correct question
To uncover what is the correct question to ask, I placed a breakpoint on the call to strncmp and ran the program. Then I asked a question: Never gonna give you up, never gonna let you down, and shook the ball in the correct order.
Yeah, breakpoint hit! Let’s see what are the arguments:

The first one is the string that we have entered, the second one is the string that we need to enter!
Let’s rerun the program with the correct question.
Yay, we got the flag 🚩
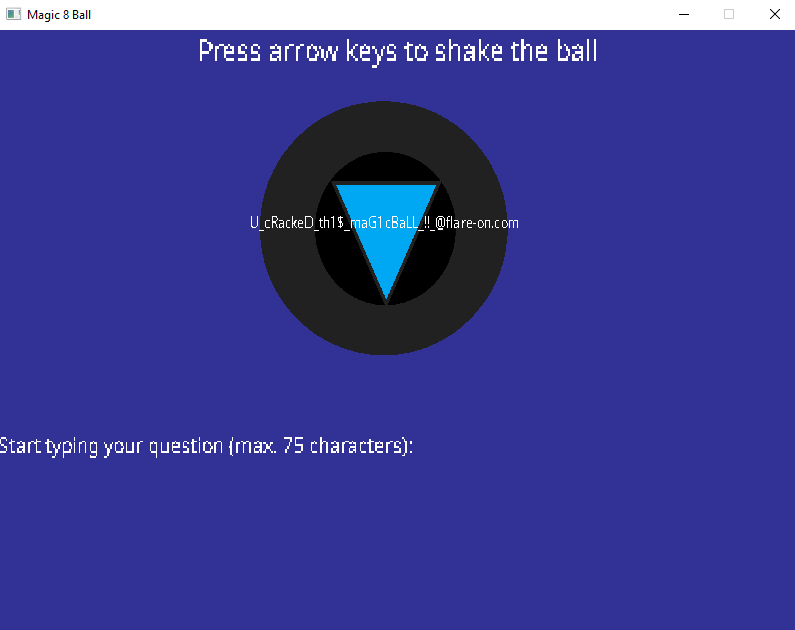
Flag: U_cRackeD_th1$_maG1cBaLL_!!_@flare-on.com
4. 🔙 darn_mice
Technologies: C/C++, GUI
Tools used: IDA, python, z3
Time: < 2 hours
Rating: ⭐⭐⭐⭐
Backstory
I started to solve this challenge in the middle of the night ✨, so I was a bit tired. And it definitely affected my reversing skills. I spent a lot of time trying to understand what is going on in the program, but I didn’t get very far.
Anyways, I decided to return to this challenge later and I’m glad I did. In the morning I was able to solve it almost instantly.
The moral of this story is, don’t forget to sleep well. It’s important for your health and reversing skills 😎.
Let’s start
Finally, to the challenge itself. We are given the file darn_mice.exe. Running it, we can see, that nothing happens 🙄.
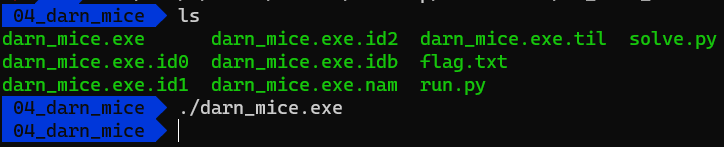
Let’s open it in IDA and realize what’s going on.
int __cdecl main(int argc, const char **argv, const char **envp)
{
  if ( argc == 2 )
    sub_201000((char *)argv[1]);

  return 0;
}
The program accepts one argument and passes it to the sub_201000 function.
Oh, that’s why it didn’t do anything when we ran it without arguments. Let’s see what happens if we run it with some argument.
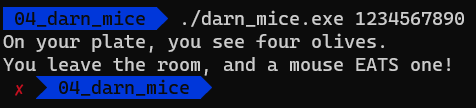
Great… More riddles…. Let’s have a look at what’s going on in the sub_201000 function.
int __cdecl sub_201000(char* argv_1)
{
    ...
    printf("On your plate, you see four olives.\n");
    arg_len = strlen(argv_1);
    if (!arg_len || arg_len > 35)
        return printf("No, nevermind.\n");

    printf("You leave the room, and a mouse EATS one!\n");
    for (i = 0; i < 0x24 && consts_array[i] && argv_1[i]; ++i) {
        rwx_mem = (void(__cdecl*)(_DWORD))VirtualAlloc(0, 0x1000u, 0x3000u, 0x40u);
        *(_BYTE*)rwx_mem = argv_1[i] + consts_array[i];
        rwx_mem(rwx_mem);
        printf("Nibble...\n");
    }

    printf("When you return, you only: %s\n", argv_1);
    sub_201280((int)byte_219000, 45, (PUCHAR)argv_1, (PUCHAR) "salty", (int)byte_219000, 45);
    return printf("%s\n", byte_219000);
}
What’s going on here? Let’s look at the code line by line:
- First, it checks the length of the argument.
- Then, if the length is correct it enters a loop. In this loop, it allocates memory with the
VirtualAllocfunction. - After that, it adds the current character of the argument to the current element of the
consts_arrayarray and stores the result in the allocated memory. - Finally, it calls newly allocated memory as a function.
Whoa, that’s weird. So we are allocating memory, writing some data to it, and then calling it as a function. Okay, so that means, that we can write our own code and execute it. But what shall we write?
That’s the question that genuinely bothered me in the middle of the night 😴.
Doing some utterly useless stuff
Instead of going to sleep, I decided that it is a good idea to write a python script that will bruteforce argument value byte by byte. In my head, it should’ve worked, because we have a crash oracle that can tell us if we are on the right track or not. (“Nibble…” in the output - the byte is correct).
import subprocess
def main():
guess = b''
while True:
for b in range(0x1f + 1, 256):
cur_guess = guess + bytes([b])
p = subprocess.Popen(["darn_mice.exe", cur_guess], stdout=subprocess.PIPE)
if p.wait() != 0:
print(f'Current guess: , trying next one...')
else:
out, err = p.communicate()
if b'Nibble...' in out:
print('Found byte: {}'.format(b))
print('Current guess: {}'.format(cur_guess))
guess = cur_guess
break
if __name__ == '__main__':
main()
After running this script for a while, I got the following output:
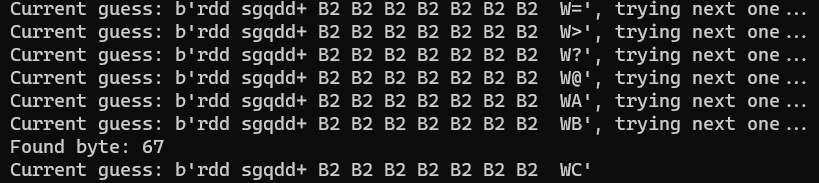
Hmm, looks weird. It’s not what I expected but let’s see what happens if we run the program with the argument that we’ve got.

Mhm, okay, so it’s not the flag.
I think it’s time to go to sleep.
Coming back with fresh ideas
In the morning something clicked in my head and I realized that I was doing it all wrong. Instead of bruteforcing, I should’ve made all the code bytes equal to 0xC3 (ret instruction)! It’s kind of obvious, but I didn’t think about it in the middle of the night :D
So, let’s write a simple z3 script that will generate the argument for us.
z3 is not required for this challenge, but I like to use it for solving CTF challenges.
import z3


# Creates a list of z3 bit vectors of length 8
def BitVecVector(name, n):
    return [z3.BitVec('%s_%s' % (name, i), 8) for i in range(n)]


def main():
    constraints = [0x50, 0x5E, 0x5E, 0x0A3, 0x4F, 0x5B, 0x51, 0x5E, 0x5E, 0x97, 0x0A3, 0x80, 0x90, 0x0A3, 0x80, 0x90, 0x0A3, 0x80, 0x90, 0x0A3, 0x80, 0x90, 0x0A3, 0x80, 0x90, 0x0A3, 0x80, 0x90, 0x0A3, 0x80, 0x90, 0x0A2, 0x0A3, 0x6B, 0x7F]
    arg = BitVecVector('arg', len(constraints))

    solver = z3.Solver()
    for i, byte in enumerate(arg):
        solver.add(byte + constraints[i] == 0xC3)

    if solver.check() == z3.sat:
        m = solver.model()
        print(''.join(chr(m.evaluate(byte).as_long()) for byte in arg))


if __name__ == '__main__':
    main()
Running this script gives us the following output:

That makes sense, right? Let’s run the program with the argument that we’ve got.
And yeah, it’s the flag 🚩

Flag: i_w0uld_l1k3_to_RETurn_this_joke@flare-on.com
5. 🔎 t8
Technologies: C++, Network, Windows, RC4, x86-32
Tools used: IDA, Wireshark, Python
Time: ≈ 8 hours
Rating: ⭐⭐⭐ (Just reverse it, nothing special)
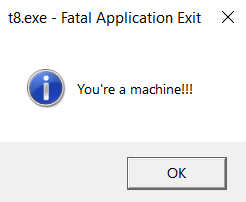
Finally, we are getting to a truly reverse engineering challenge. And probably the one thing that we have to do in this one - … is to reverse it! 🤯
First look
We are given two files - t8.exe and traffic.pcapng. Let’s take a quick look at the capture file.
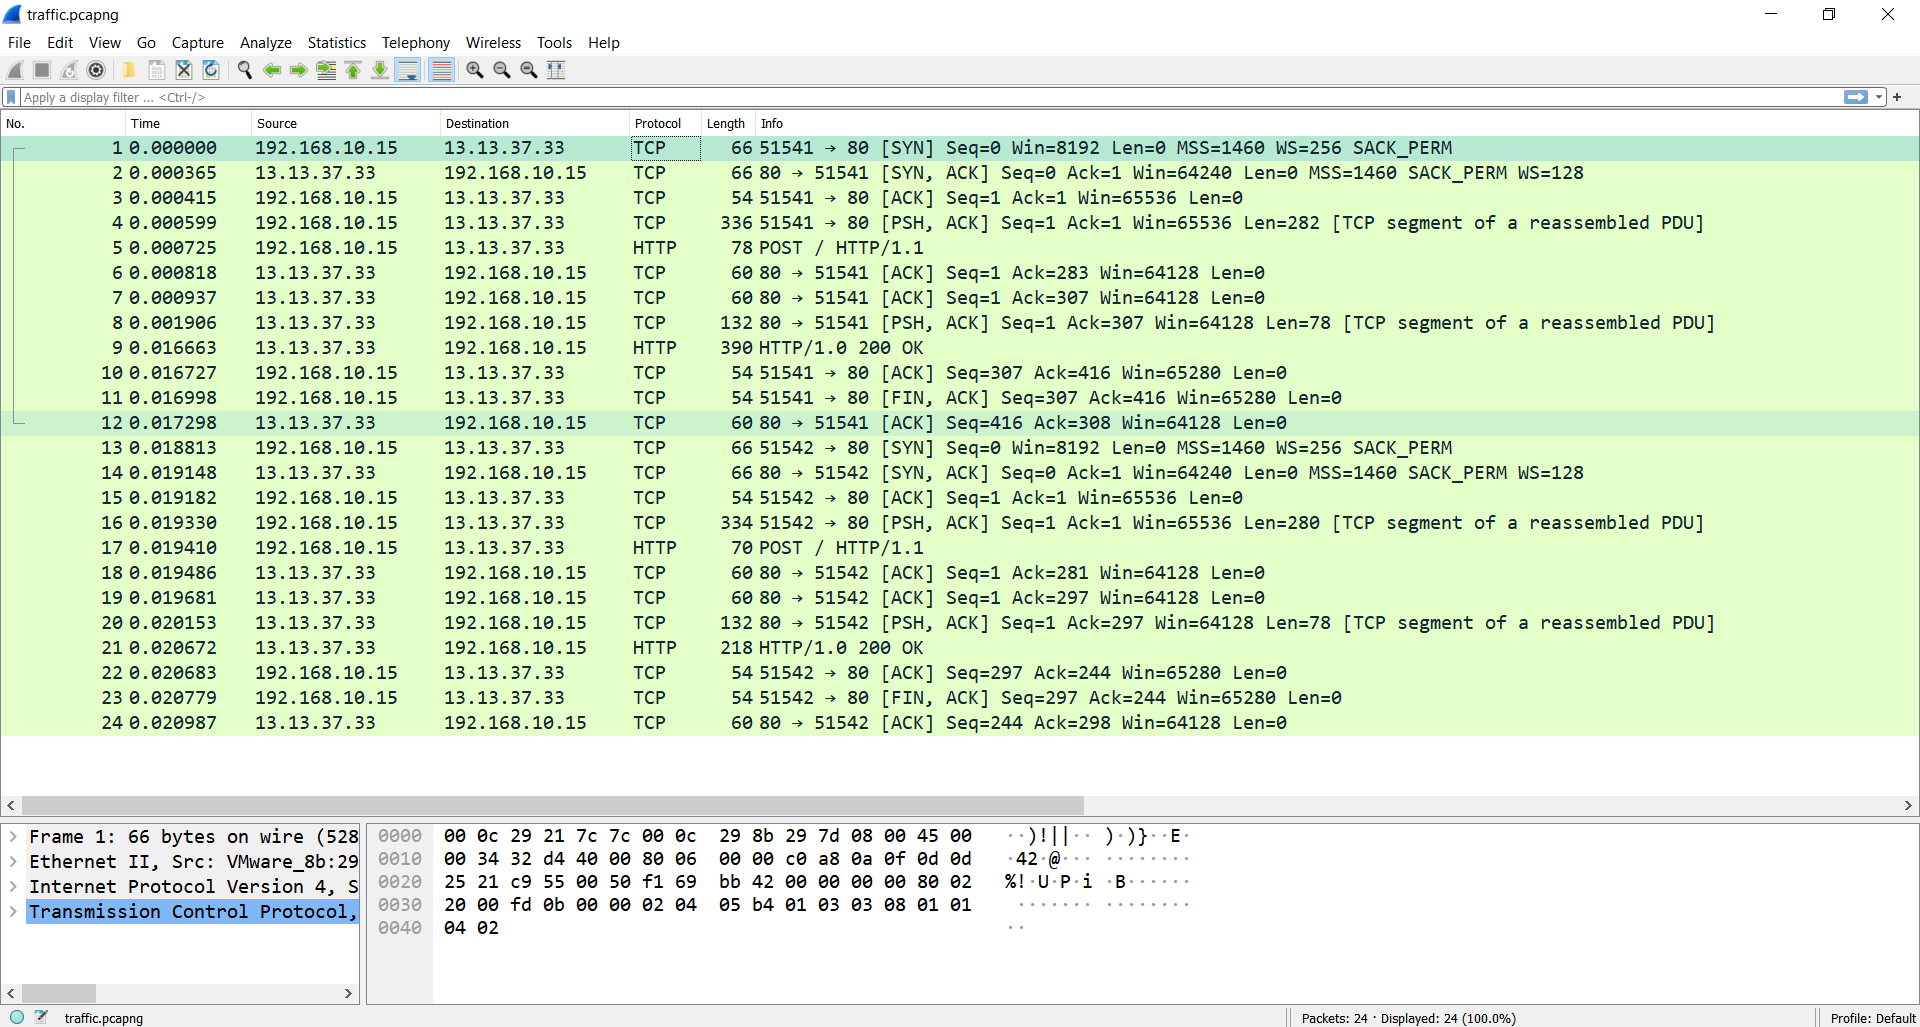
In this capture, we can observe two TCP streams.
Inside the first one, there is an HTTP request to http://www.flare-on.com/ with an unknown base-64 encoded body. The answer from the server is also a base-64 encoded string.
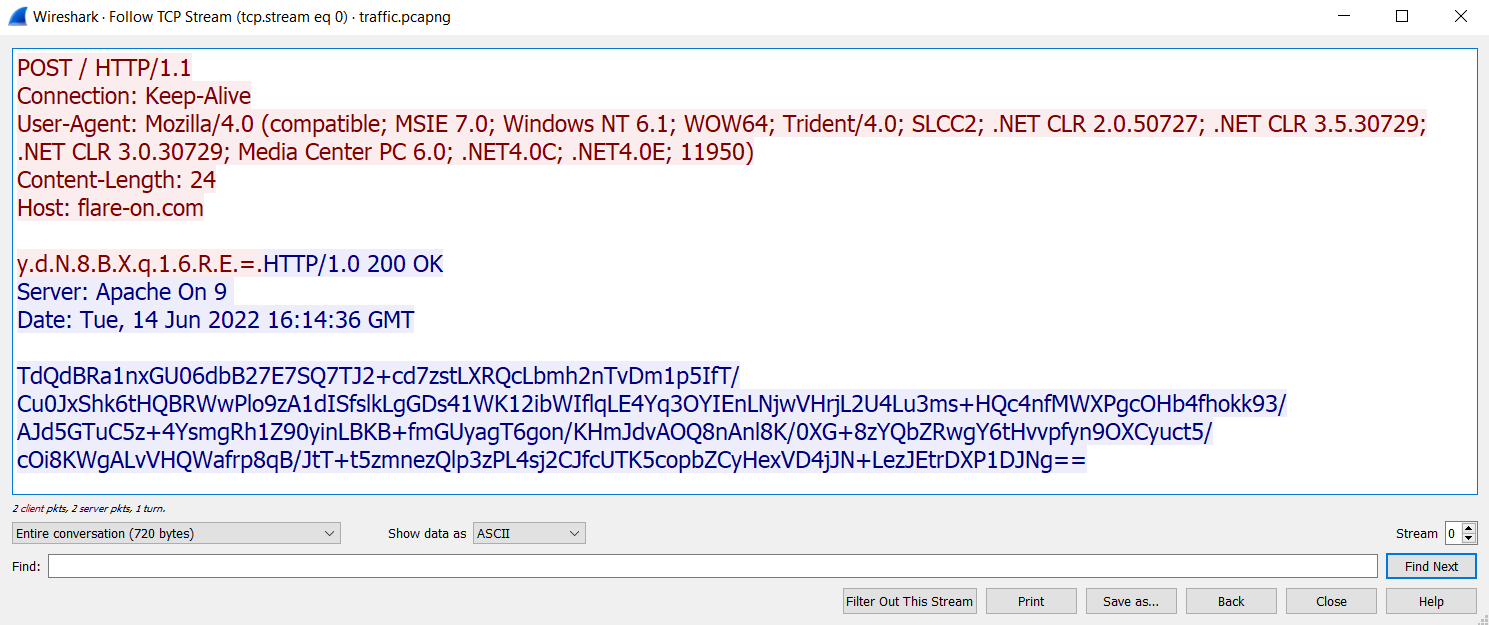
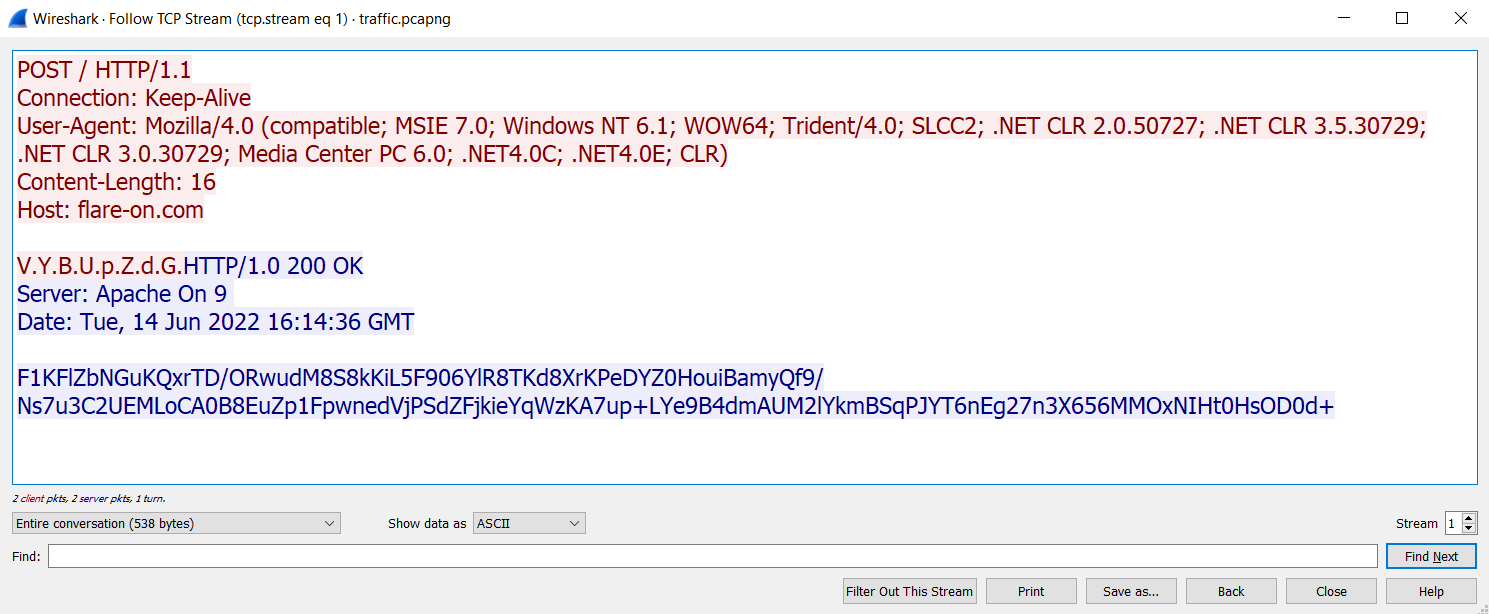
For the second stream, we can see the same thing, but the request and the response are different.
Just to be sure, let’s try to decode the base64 data and see what happens.
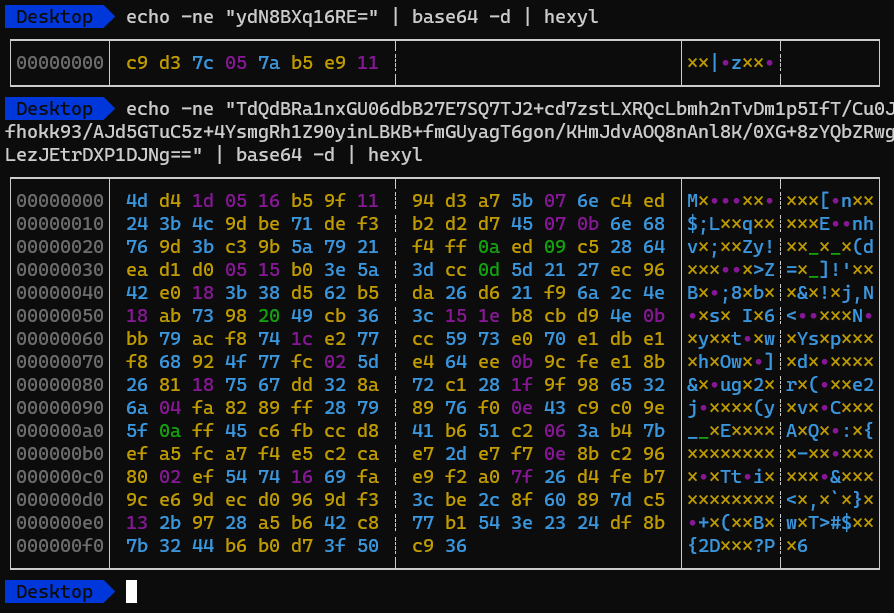
Okay, nothing interesting here. Let’s take a look at the executable.
Opening it in IDA we can see:
int __cdecl main(int argc, const char** argv, const char** envp)
{
...
while (sub_404570(xmmword_45088C, DWORD1(xmmword_45088C), DWORD2(xmmword_45088C), HIDWORD(xmmword_45088C)) != 0xF)
Sleep(0x2932E00u);
memset(v45, 0, sizeof(v45));
*(_QWORD*)Block = 0x7C007E0072003Fi64;
memset(v46, 0, sizeof(v46));
v3 = 8;
v43 = _mm_xor_si128((__m128i)xmmword_44B980, (__m128i)xmmword_44B884);
do
v43.m128i_i16[v3++] ^= 0x11u;
while (v3 < 0xC);
...
*(_QWORD*)v45 = 0x79006F00680061i64;
*(_WORD*)&v45[8] = 0;
v45[0xA] = 0;
memset(v46, 0, sizeof(v46));
v38[4] = 0;
v39 = 7;
LOWORD(v38[0]) = 0;
sub_405930(v38, v45, wcslen((const unsigned __int16*)v45));
LOBYTE(v52) = 3;
sub_405450(v38);
(*(void(__thiscall**)(_DWORD*))(*v5 + 0x1C))(v5);
(*(void(__thiscall**)(_DWORD*, void**))(*v5 + 0x20))(v5, v40);
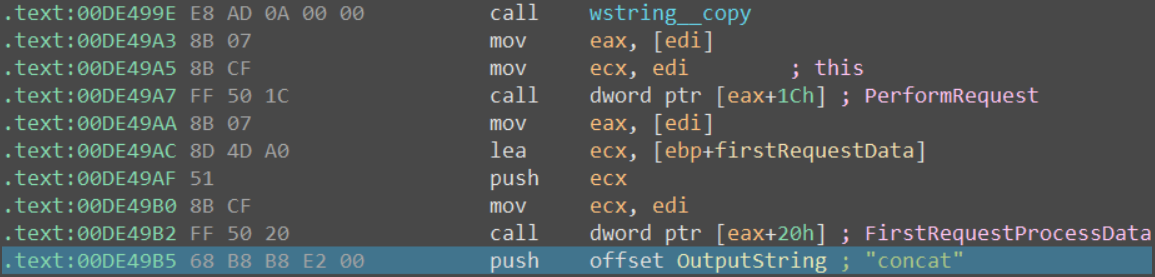
LOBYTE(v52) = 4;
OutputDebugStringW(L"concat");
...
v23 = v36[0];
if (2 * v37 + 2 >= 0x1000) {
v23 = (void*)*((_DWORD*)v36[0] + 0xFFFFFFFF);
if ((unsigned int)(v36[0] - v23 - 4) > 0x1F)
LABEL_42:
_invalid_parameter_noinfo_noreturn();
}
sub_41D67D(v23);
return result;
}
😬😬😬
Ouch, that’s hideous! At the first glance, it is obvious that we have to reverse c++ code with virtual calls…
You know what? Before doing anything else, let’s try to run the program and figure out what it does. But before we start, we have to do some preparations.
Trying to replay the traffic
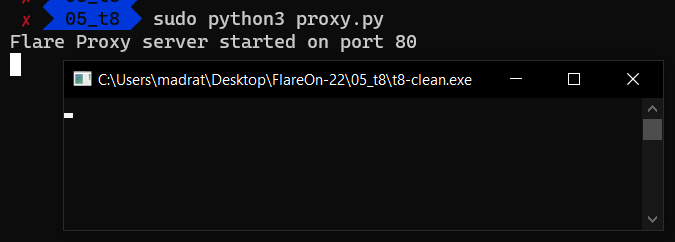
Firstly, we will need to implement a simple HTTP server to handle the requests from the program. I wrote a python script to replay captured traffic: proxy.
import socket
def process_connection(conn, addr, to_send, session_num):
# receive data from client and send response
print(f"Iter: . Connection from has been established.")
data = conn.recv(1024)
print(data)
conn.send(to_send)
conn.close()
def main():
s = socket.socket(socket.AF_INET, socket.SOCK_STREAM)
s.bind(('localhost', 80))
s.listen(1)
response1 = ...
response2 = ...
session_num = 1
print('Flare Proxy server started on port 80')
while True:
conn, address = s.accept()
process_connection(conn, address, response1, session_num)
session_num += 1
conn, address = s.accept()
process_connection(conn, address, response2, session_num)
session_num += 1
if __name__ == '__main__':
main()
Secondly, we have to reroute the traffic from the program to our proxy. To do this, I simply added a rule to the hosts file:
127.0.0.1 flare-on.com
With this done, let’s run the program and see what happens.
Okay, seems like nothing happened. No connections, no output. Looks like we have to reverse the code 😢
Reversing the time check
After some time of reversing, I found a clue as to why the program does nothing.
There is a check at the beginning of the main function:
for (i = g_SystemTime; CalculateMoonPhase(*&i.wYear, *&i.wDayOfWeek) != 0xF; i = g_SystemTime)
    Sleep(43200000u);
Funny fact, Copilot suggested to me, that
CalculateMoonPhase(previously namedTime) is in fact a function that calculates the moon phase.
As a side note, it can be helpful to use Copilot/denigma and similar products to get some idea of the code as you reverse it.
So, the program checks the moon phase 🌙 and if it is not equal to 0xF (Full Moon 🌕), it sleeps for 12 hours and checks again.
Let’s use the helper utility RunAsDate to change the time to the full moon day and try to run the program again.
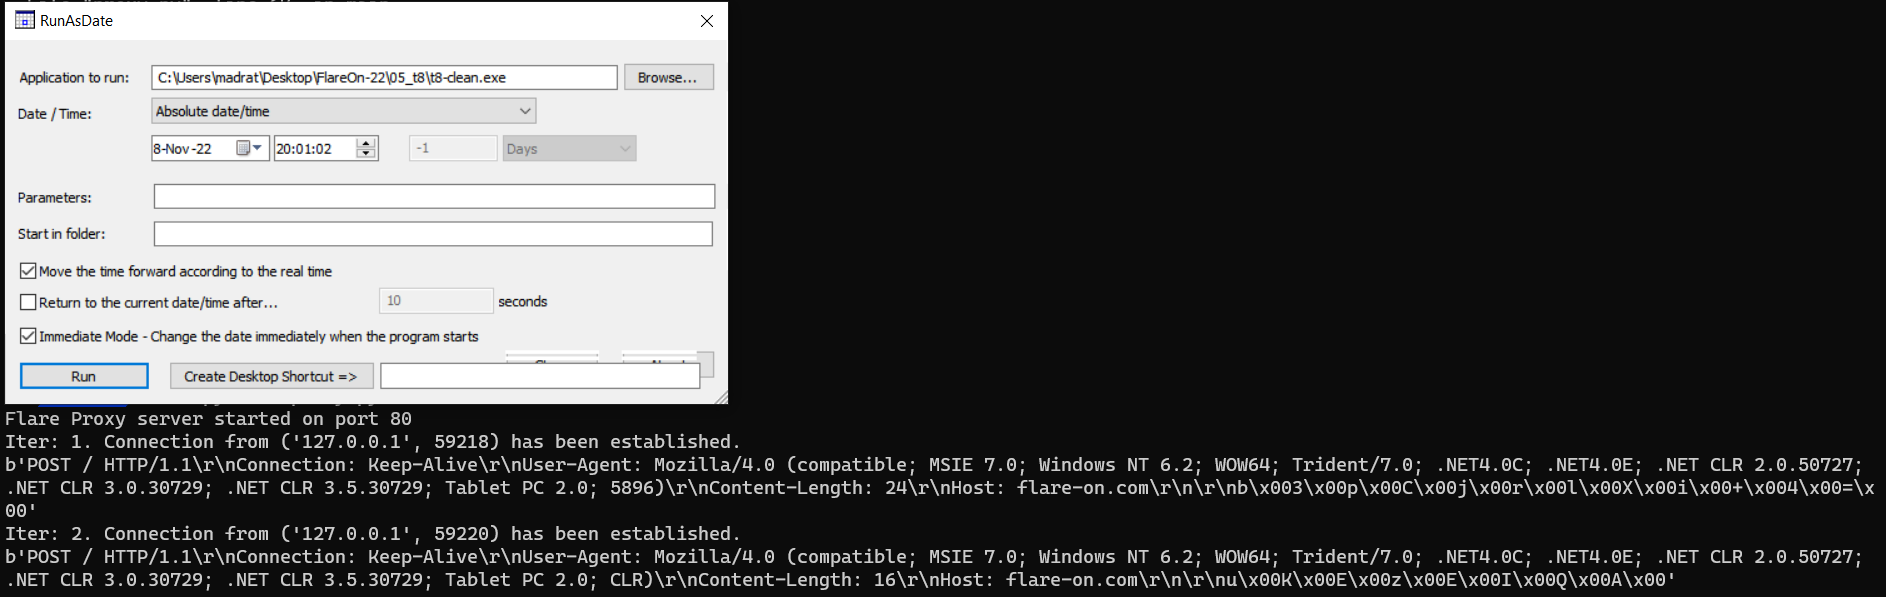
Aha, now we can notice that the program successfully connected to the proxy-server, and the server received a request. But nothing interesting happened after that 😢
Hours of reversing later
After a few hours of reversing I started to understand what is going on.
First of all, I found the Initialize function.
int Initialize()
{
    struct _SYSTEMTIME SystemTime; // [esp+4h] [ebp-20h] BYREF

    wstring::create(g_FO9_const, L"FO9", 3);
    GetLocalTime(&SystemTime);

    srand(SystemTime.wMilliseconds + 1000 * (SystemTime.wSecond + 0x3C * SystemTime.wMinute)); // Total milliseconds
    g_randomVal = rand();
    g_SystemTime = SystemTime;
    return atexit(sub_70DC50);
}
As can be seen from the code, this function defines two global variables g_randomVal and g_SystemTime. The first one is a random value generated using a random seed, which is calculated using the current time (in milliseconds). Later, the random value is used to create a so-called “session key” and to decrypt the received flag.
To be noted, this function is called right after the program starts. So it’s almost impossible to recover the initial random seed (for example by bruteforcing near the time the first request was sent) without some more hints.
Client object creation
Okay, anyways, let’s return to the main function and work it out line by line.
At the beginning of the main function (after the moon phase check) we can observe the following code:
wcscpy(random_val_str, L"?r~|");
*(&ahoy_str[1] + 1) = 0i64;
LOBYTE(ahoy_str[1]) = 0;
memset(v47, 0, sizeof(v47));
counter = 8;
flare_on_string = _mm_xor_si128(xmmword_71B980, xmmword_71B884);
do
    flare_on_string.m128i_i16[counter++] ^= 0x11u;
while ( counter < 0xC );
What we have here is that the program decrypts some string and in the end, we obtain the following: L"flare-on.com".
This string is then passed to the CClientSock constructor as an address for the remote server.
cclient_obj = CClientSock::Ctor(
                v4,
                flareon_str.pointer,
                *flareon_str.local_buf,
                *&flareon_str.padding[4],
                *&flareon_str.padding[8],
                flareon_str.capacity,
                flareon_str.size);
LOBYTE(v52) = 0;
request_type[0] = 'P';
request_type['\x01'] = 'O';
request_type['\x02'] = 'S';
request_type['\x03'] = 'T';
Besides that, the object holds everything we need to successfully interact with the server. (Even the key 🗝). But we will get to that later.
Session key generation and the first request
Finally, we reached an interesting part of the code:
...
randomValStr = IntToStr(<buffer>, g_randomVal); // <random int>
...
{
    v15 = wstring::concat(g_FO9_const, len, Src, randomValStr, len); // FO9<random int>
}
What we have here is that the program concatenates the string FO9 with the random value generated in the Initialize function. Then the hash is calculated using the md5 algorithm.
wstring::copy(&random_str, v15);
(cclient_obj->vftable_ptr->MD5_Hash_ToString)(cclient_obj, random_str.pointer);
What is curious, every time we call MD5_Hash_ToString, the program saves the resulting hash value to the hash_ptr variable.
void __thiscall MD5_Hash_ToString(struct CClient* this, std::wstring* string_to_hash)
{
    ...
    v4 = (this->vftable_ptr->MD5_Hash)(p_string_to_hash); // MD5_Hash
    ...
    wstring::create(&this->hash_ptr, v4, (v5 - (v4 + 2)) >> 1);
    ...
}
The value of the hash_ptr is then used in a few places:
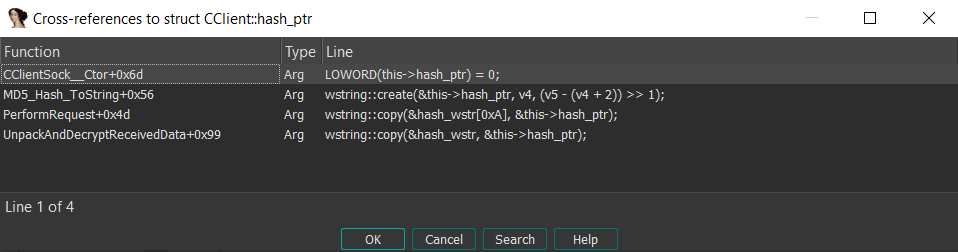
Especially noteworthy are the PerformRequest and UnpackAndDecryptReceivedData functions.
Here is the cleaned-up PerformRequest function:
bool __thiscall PerformRequest(struct CClient* this, std::wstring str)
{
    ...
    wstring::copy(&hash_wstr[0xA], &this->hash_ptr);
    encrypted_str = (this->vftable_ptr->EncryptData)(this, *&hash_wstr[0xA], p_request_number_of_bytes_to_read);
    (this->vftable_ptr->Base64EncodeWrapper)(this, encrypted_base64, encrypted_str, len);

    memset(pszUAOut, 0, sizeof(pszUAOut));
    memset(user_agent_str, 0, sizeof(user_agent_str));
    cbSize = 0x200;
    if (ObtainUserAgentString(0, pszUAOut, &cbSize)) {
        ...
    }

    randomVal = g_randomVal;
    pszUAOut[cbSize - 2] = 0;
    IntToStr(random_val_str, randomVal);
    mbstowcs_s(&PtNumOfCharConverted, user_agent_str, 0x200u, pszUAOut, strlen(pszUAOut));
    wcscat_s(user_agent_str, 0x200u, L"; ");
    if (v45) {
        user_agent_add = random_val_str;
    }
    else {
        user_agent_add = L"CLR";
    }

    wcscat_s(user_agent_str, 0x200u, user_agent_add);
    wcscat_s(user_agent_str, 0x200u, L")");
    hSession = WinHttpOpen(user_agent_str, 0, 0, 0, 0);
    if (hSession) {
        p_flare_on_str = &this->flare_on_str;
        hConnect = WinHttpConnect(hSession, p_flare_on_str, 0x50u, 0);
        hInternet = hConnect;
        if (hConnect) {
            hRequest = WinHttpOpenRequest(hConnect, this->request_type, 0, 0, 0, 0, 0);
            if (hRequest) {
                request = WinHttpSendRequest(hRequest, 0, 0, encrypted_base64, 2 * v39, 2 * v39, 0);
                if (request) {
                    response = WinHttpReceiveResponse(hRequest, 0);
                    if (response) {
                        numberOfBytesToRead = &this->request_number_of_bytes_to_read;
                        do {
                            while (1) {
                                p_request_number_of_bytes_to_read = &this->request_number_of_bytes_to_read;
                                *&hash_wstr[0xA] = hRequest;
                                *numberOfBytesToRead = 0;
                                WinHttpQueryDataAvailable(*&hash_wstr[0xA], p_request_number_of_bytes_to_read);
                                if (*numberOfBytesToRead <= 0x800)
                                    break;

                                this->request_number_of_bytes_to_read = 0x800;
                            }

                            WinHttpReadData(hRequest, this->received_buffer, *numberOfBytesToRead, &dwNumberOfBytesRead);
                        } while (this->request_number_of_bytes_to_read);
                    }
                }

                WinHttpCloseHandle(hRequest);
            }

            WinHttpCloseHandle(hInternet);
        }

        WinHttpCloseHandle(hSession);
    }
    ...
}
It is clearly seen that the hash_ptr is used in the EncryptData function.
_BYTE* __thiscall EncryptData(struct CClient* this, std::wstring* key, size_t out_len)
{
    ...
    RC4_Init(&rc4_obj, out_len, 2 * len, v3);
    output_buffer = malloc(data_len);
    memset(output_buffer, 0, data_len);
    RC4_Encrypt(&rc4_obj, to_encrypt, output_buffer, data_len); // encrypt L"ahoy"
    ...
    return output_buffer;
}
This function is responsible for encrypting/decrypting the data using the RC4 algorithm.
What about the second interesting function - UnpackAndDecryptReceivedData?
Let’s take a look:
std::wstring* __thiscall UnpackAndDecryptReceivedData(struct CClient* this, std::wstring* ptr)
{
    ...
    buffer_to_decode = this->received_buffer;
    (this->vftable_ptr->Base64DecodeWrapper)(Block, buffer_to_decode);
    wstring::copy(&hash_wstr, &this->hash_ptr);
    decrypted_data = (this->vftable_ptr->EncryptData)(this, hash_wstr, v15);
}
This function is responsible for processing the received data. It first decodes the data using the Base64 and then decrypts it using the already known EncryptData function. Note that the hash_ptr is used as a key for decryption.
Okay, okay, great! Looks like we are almost there! We are only left with a few more questions to answer.
First, what data is sent to the server? To answer this question, we need to look at this code:
std::wstring ahoy_str = L"ahoy";
wstring::create(ahoy_str_wstring, ahoy_str, wcslen(ahoy_str));
random_str.pointer = 1;
LOBYTE(v52) = 3;
wstring::copy(&ahoy_str_wstr, ahoy_str_wstring);
(cclient_obj->vftable_ptr->PerformRequest)(cclient_obj, ahoy_str_wstr.pointer);// PerformRequest
(cclient_obj->vftable_ptr->FirstRequestProcessData)(cclient_obj, &firstRequestData);
LOBYTE(v52) = 4;
The only thing that is transmitted is the encrypted ahoy string. I suppose that this is a kind of handshake.
Great! Let’s move on to the next one.
How does the server know the key to decrypt the data and encrypt the response? The answer is simple:
IntToStr(random_val_str, randomVal);
mbstowcs_s(&PtNumOfCharConverted, user_agent_str, 0x200u, pszUAOut, strlen(pszUAOut));
wcscat_s(user_agent_str, 0x200u, L"; ");
...
    user_agent_add = random_val_str;
...
wcscat_s(user_agent_str, 0x200u, user_agent_add);
wcscat_s(user_agent_str, 0x200u, L")");
The server receives the user agent string, which contains the random value. So the server knows the key to decrypt the data.

Client/Server interaction overview
I think it’s time to summarize what we have so far:
- A random value is generated.
- A string version of the random number is appended to the
FO9string. - An
MD5hash of the resulting string is calculated. - The program encrypts the string
ahoyusing theRC4algorithm with the hash as a key. - Encrypted data is sent to the server.
- The client receives the response and decrypts it using the
RC4with the same key as in step 4.
This can be seen in the following diagram:

Finding the session key (the hard way)
So, we have everything to get the flag, right?
No, not so fast! In a perfect world, it might have worked. However, I was short-sighted at the time and completely overlooked the fact, that the random seed is sent to the server as a part of the user-agent 😢
So I had to find the session key in a different way.
The first idea that sprung to my mind was to acquire the random number by bruteforcing all possible key values in form of MD5(L"FD0<random int>") and trying to decrypt sent data looking for the ahoy string.
I wrote a small script to do this:
import hashlib
import base64
from arc4 import ARC4


def to_wide(s):
    return b'\x00'.join([bytes([ord(c)]) for c in s]) + b'\x00'


def main():
    template = 'FO9{}'
    plaintext_ahoy = b'a\x00h\x00o\x00y\x00'
    encrypted_ahoy = base64.b64decode(
        b"\x79\x00\x64\x00\x4e\x00\x38\x00\x42\x00\x58\x00\x71\x00\x31\x00\x36\x00\x52\x00\x45\x00\x3d\x00".decode('utf-16'))

    for i in range(100000):
        curr_try = to_wide(template.format(i))
        curr_key = to_wide(hashlib.md5(curr_try).hexdigest())

        arc4 = ARC4(curr_key)
        if arc4.decrypt(encrypted_ahoy) == plaintext_ahoy:
            print('Found: {} / {}'.format(curr_try.decode('utf-16'), curr_try))
            print('Hash: {}'.format(hashlib.md5(curr_try).hexdigest()))
            break


if __name__ == "__main__":
    main()
The script successfully found the key (hash):
Found: FO911950 / b'F\x00O\x009\x001\x001\x009\x005\x000\x00'
Hash: a5c6993299429aa7b900211d4a279848
With the key in hand, let’s proceed to the next step.
Flag decryption
To decrypt the flag I decided to spoof the first hash value right before the application decrypts the server response.
Note: It’s possible to just run the program with the patched random value and get the flag, but I decided to do it the hard way.
I did this by adding a conditional breakpoint right after the call to EncryptData inside the UnpackAndDecryptReceivedData function:
def to_wide(s):
    return b'\x00'.join([bytes([ord(c)]) for c in s]) + b'\x00'

esp_val = ida_dbg.get_reg_val('esp')
hash_ptr = idc.read_dbg_dword(esp_val)
ida_dbg.write_dbg_memory(hash_ptr, to_wide('a5c6993299429aa7b900211d4a279848'), 0x40)

# ida_dbg.disable_bpt(0x6D4496)
Also, don’t forget to add a breakpoint right after the call to FirstRequestProcessData
With this done, let’s run the program and observe what happens.
Examine the return value and you will see the flag 🚩
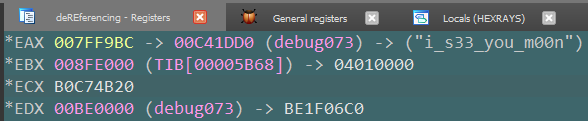
But wait, there is more! We’ve got the flag, but what is the code that should execute later?
Code decryption
To find it out we just need to remove the conditional breakpoint and let the program continue. It will decrypt the code using the hash of the flag as a key and execute it.
With this done, we finally can say that the challenge is solved 😎
Flag: i_s33_you_m00n@flare-on.com
6. 🧪 alamode
Technologies: C++, Dotnet, RC4
Tools used: IDA, Python
Time: < 2 hours
Rating: ⭐⭐⭐
Hurray, almost half of the challenges are solved! 🎉
This time we are given a HowDoesThisWork.dll. Opening it in Detect It Easy shows that it is a .NET assembly.
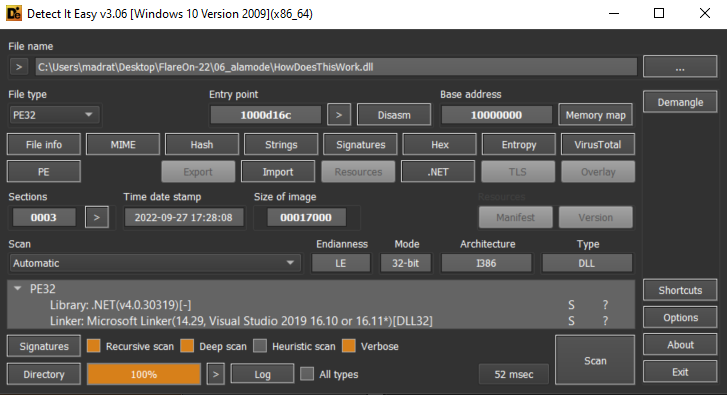
Okay, without any further ado, let’s drop it into dnSpyEx and see what we have.
Investigating the assembly
using System;
using System.IO.Pipes;
using System.Text;

namespace FlareOn
{
    // Token: 0x02000002 RID: 2
    public class Flag
    {
        // Token: 0x06000001 RID: 1 RVA: 0x0000D078 File Offset: 0x0000C478
        public string GetFlag(string password)
        {
            Decoder decoder = Encoding.UTF8.GetDecoder();
            UTF8Encoding utf8Encoding = new UTF8Encoding();
            string text = "";
            byte[] array = new byte[64];
            char[] array2 = new char[64];
            byte[] bytes = utf8Encoding.GetBytes(password + "\0");
            using (NamedPipeClientStream namedPipeClientStream = new NamedPipeClientStream(".", "FlareOn", PipeDirection.InOut))
            {
                namedPipeClientStream.Connect();
                namedPipeClientStream.ReadMode = PipeTransmissionMode.Message;
                namedPipeClientStream.Write(bytes, 0, Math.Min(bytes.Length, 64));
                int num = namedPipeClientStream.Read(array, 0, array.Length);
                int chars = decoder.GetChars(array, 0, num, array2, 0);
                text += new string(array2, 0, chars);
            }
            return text;
        }
    }
}
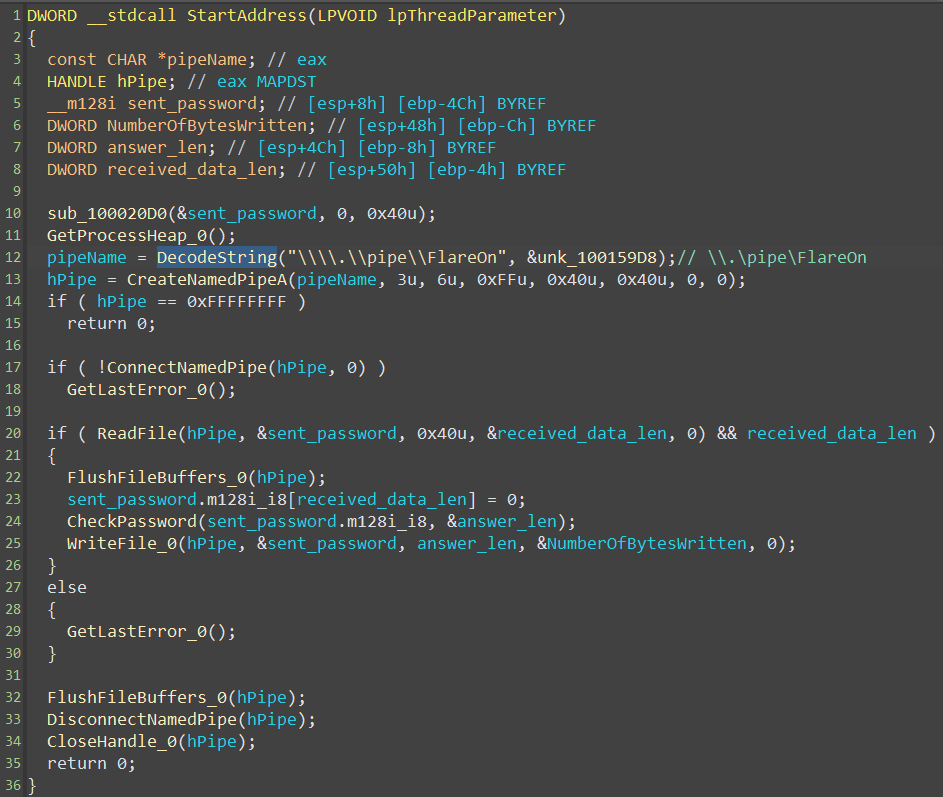
Hmm, that’s all? Seems weird. We only have a class with a single method that returns the flag. However, it appears that the method is using a pipe to communicate with another process, which is probably the one that generates the flag. But where is the code that generates the flag? 🤔
Let’s take a look at the second given file IR chat log.txt
[FLARE Team]  Hey IR Team, it looks like this sample has some other binary that might
              interact with it, do you have any other files that might be of help.

[IR Team]     Nope, sorry this is all we got from the client, let us know what you got.
So, it looks like we are given everything we need… However, we surely don’t have everything we need 😢 Or do we?
What should we do? At this moment I started doing some random things. For example, I went back to Detect It Easy and checked the .text section of the assembly. The size gives us a clue that we might have some code there.
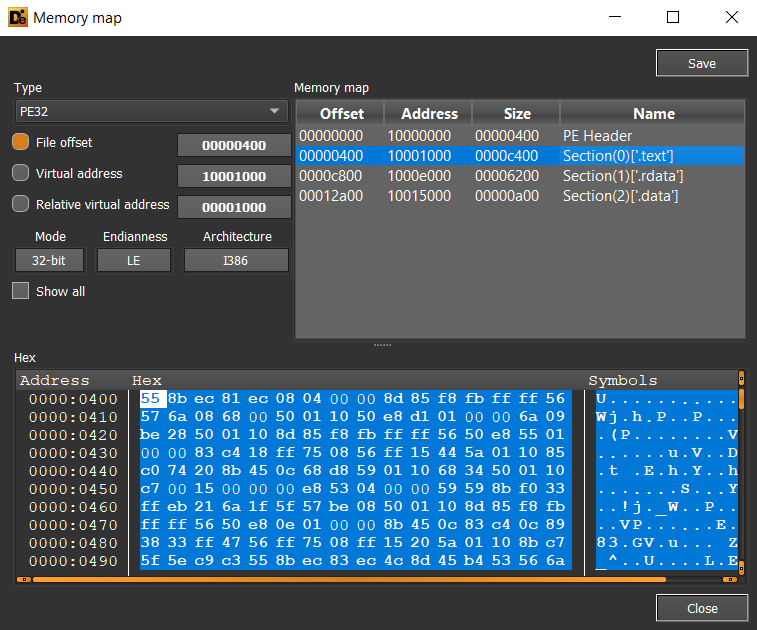
But how to get to it?
After some time of googling about embedding native code into dotnet-dlls I’ve stumbled upon this article: Mixed (native and managed) assemblies. Which gave me a hint that the assembly is actually a mixed assembly (native and managed code). So we just need to open it in a different mode. For example, we can load it in IDA but instead of selecting .NET assembly, we should select Portable executable file format.

Yeah, now we can spot the native code 😀
Now we just need to reverse it!
Reversing the native code
The first thing I’ve noticed is that the code is a bit obfuscated. For example, the strings are encrypted and library functions are called at runtime using GetProcAddress.
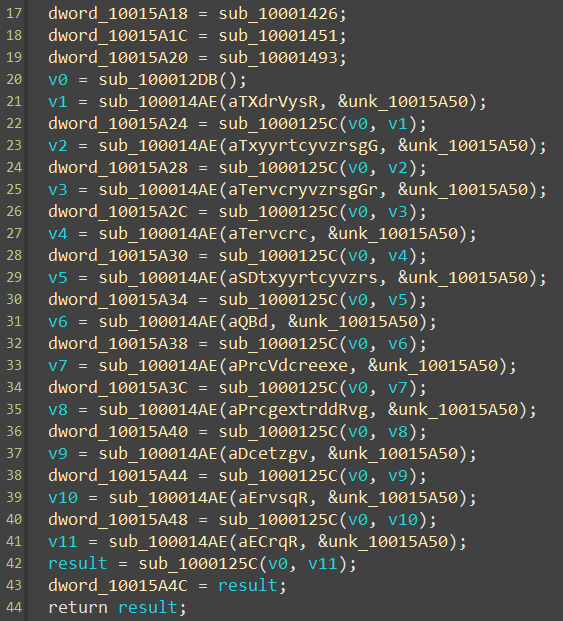
To make the reversing process easier, I’ve created a simple script that decrypts the strings.
import idautils
import idaapi
import ida_bytes
import idc
def decrypt_str(s: bytes) -> bytes:
return b''.join(bytes([b ^ 0x17]) for b in s)
def string_len(addr: int) -> int:
str_len = 0
while ida_bytes.get_byte(addr) != 0:
str_len += 1
addr += 1
return str_len
def patch_string(addr, new_str):
for i, b in enumerate(new_str):
idc.patch_byte(addr + i, b)
decode_string_loc = 0x100014AE
xrefs = list(idautils.XrefsTo(decode_string_loc))
for xref in xrefs:
call_args = idaapi.get_arg_addrs(xref.frm)
if call_args:
enc_str_push_loc = call_args[0]
enc_str_loc = idc.get_operand_value(enc_str_push_loc, 0)
enc_str_len = string_len(enc_str_loc) # idc.get_strlit_contents(enc_str_loc)
enc_str = idaapi.get_bytes(enc_str_loc, enc_str_len)
dec_str = decrypt_str(enc_str)
patch_string(enc_str_loc, dec_str)
print(f' -> ')
After running it we get a much more readable code:
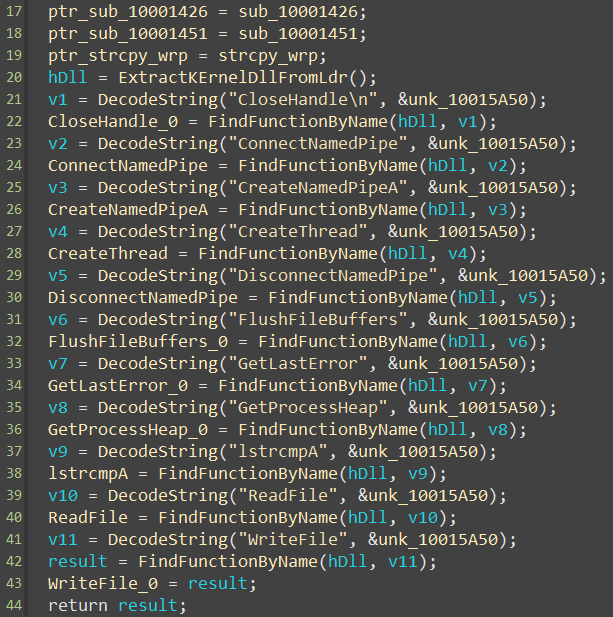
With the strings decrypted and the names of some functions restored, we can start reversing the code.
Doing it for a while, I’ve found the following interesting function:
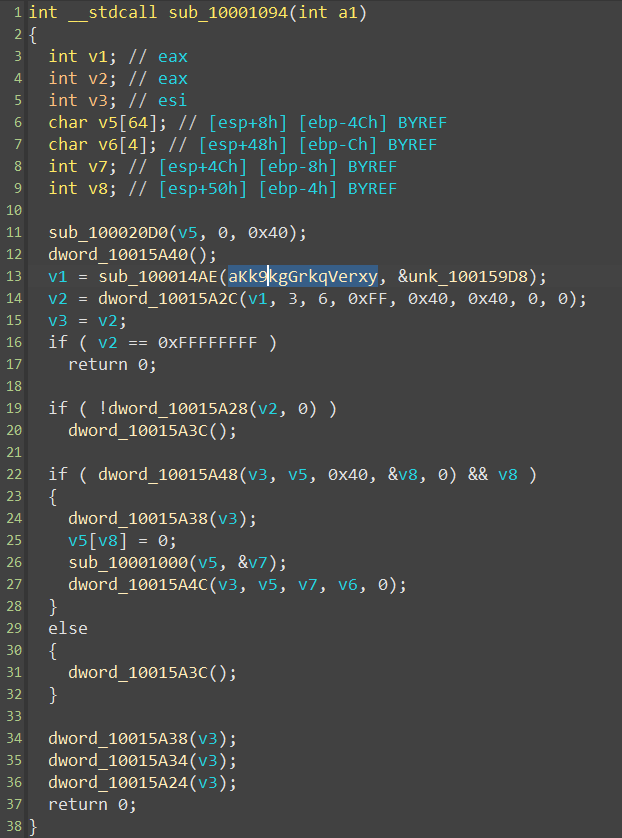
After cleaning up the code a bit, we get the following:
That’s surely the function that generates the flag 🎉 So, let’s take a closer look, and bring to light how the password is checked.
int __cdecl CheckPassword(char *input_password, _DWORD *out_len)
{
    char *out_msg; // esi
    int v3; // edi
    int rc4_state[258]; // [esp+8h] [ebp-408h] BYREF

    RC4_Init(rc4_state, &byte_10015000, 8);
    RC4_Encrypt(rc4_state, encrypted_password, 9);
    if ( lstrcmpA(encrypted_password, input_password) )
    {
        *out_len = 0x15;
        out_msg = DecodeString("Authorization Failed", &unk_100159D8);
        v3 = 0;
    }
    else
    {
        out_msg = encrypted_flag;
        RC4_Encrypt(rc4_state, encrypted_flag, 0x1F);
        *out_len = 0x1F;
        v3 = 1;
    }

    ptr_strcpy_wrp(input_password, out_msg);
    return v3;
}
This function takes an input_password and compares it to the key. However, the encrypted_password is first deciphered using RC4 with a static key. So it’s simply a matter of extracting the key and decrypting the password and the flag. Running the script below
from arc4 import ARC4
def main():
arc4 = ARC4(b'\x55\x8B\xEC\x83\xEC\x20\xEB\xFE')
decrypted_password = arc4.decrypt(b'\x3E\x39\x51\xFB\xA2\x11\xF7\xB9\x2C').decode('ascii')
decrypted_flag = arc4.decrypt(b'\xE1\x60\xA1\x18\x93\x2E\x96\xAD\x73\xBB\x4A\x92\xDE\x18\x0A\xAA\x41\x74\xAD\xC0\x1D\x9F\x3F\x19\xFF\x2B\x02\xDB\xD1\xCD\x1A').decode('ascii')
print(f'Password: ')
print(f'Flag: ')
if __name__ == "__main__":
main()
We get the passoword: MyV0ic3!
And the flag 🚩
Flag: M1x3d_M0dE_4_l1f3@flare-on.com
7. 🔥 The conclusion (p. 1)
This was the first part of the writeup. In the next part, I’ll talk about the remaining challenges, including the 08_backdoor challenge, which was the hardest one for me.
You can find the second part here: 🕹 Flare-On 9 Writeups (p. 2).